How to Set Up Your Blog Archive on Squarespace
I’ve previously shared details on setting up a food blog recipe index on Squarespace and, as the same process applies to setting up blog archives of any kind, thought I’d re-publish the instructions in a format that’s specific to general blog archives!
Squarespace is a great option for hosting blogs of any topic area, as it’s easy to set up and maintain, its templates are design-focused and include built-in blog functionality, and it’s easy to organize blog content for visitors to find. (All reasons why Squarespace is my favorite website platform for new bloggers!)
Though any Squarespace blog comes with a native “Blog List” page populated with a complete archive of your site’s blog posts in reverse chronological order (newest first), it can be useful to set up a custom blog archive page that’s organized in a way that’s most useful to your site visitors—and that’s easily searchable too.
A custom-organized and searchable blog archive page is beneficial to blogs of any size, but is especially important if you have lots of blog content published on your site.
Below I’ll walk through some key tips for setting up a custom blog archive page on Squarespace:
Tips for setting up your Squarespace blog archive
First and foremost, you’ll want to follow most of the same blogging principles that apply to other successful blogs on Squarespace.
I’ve shared lots about this before—how to write a good blog post that engages your readers and boosts your website’s SEO; how to promote your blog content to grow your audience; how to make sure your blog is mobile-friendly, etc.
Once you have great blog content, you’ll want to make sure it’s easy to find and access!
The purpose of a blog archive page is to provide a central location on your website for visitors to access and search for the specific content they’re looking for, in addition to discovering other content of interest.
As such, your blog archive page should include both an easy-to-navigate index of your blog content as well as search capability for visitors to find content based on a specific category or keyword.
How to create a custom blog archive on Squarespace
Building a custom blog archive page on a Squarespace website is actually quite simple!
To create one, you’ll use a collection of summary blocks that feature different types of content from your blog. You’ll then use your blog’s categories and tags to organize your content and tell each summary block exactly which category of posts to include.
Here’s how I’d recommend setting up your blog archives page:
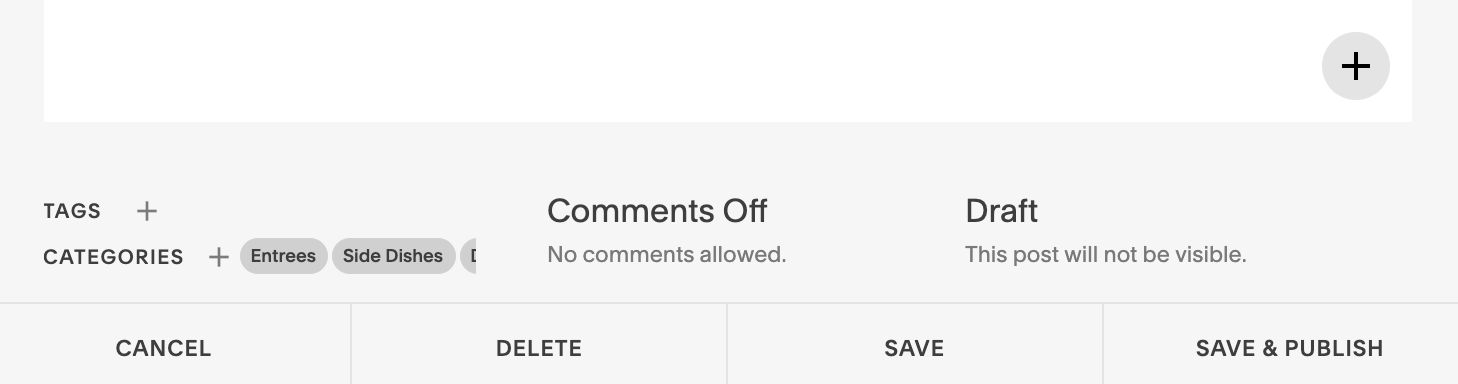
1. Choose your blog categories
These are the categories we’ll be sorting by in your archives (for example, on my blog I use Web Design, Blogging, Entrepreneurship, etc.). When you create new blog posts, you’ll assign each post to one of these categories.
2. Create a unique blog category for each.
Once you’ve determined the blog categories you’ll be using, you can create these categories either at the bottom of your Blog Post Editor or in your Blog Settings.
Adding Categories in your Blog Post Editor:
Adding Categories in your Blog Settings:

3. Create a new page for your blog archive
This page is where your blog index will be displayed. We’ll walk through step-by-step set-up instructions for two different archive page display options:
Option 1: Visual summary blocks on one archive page
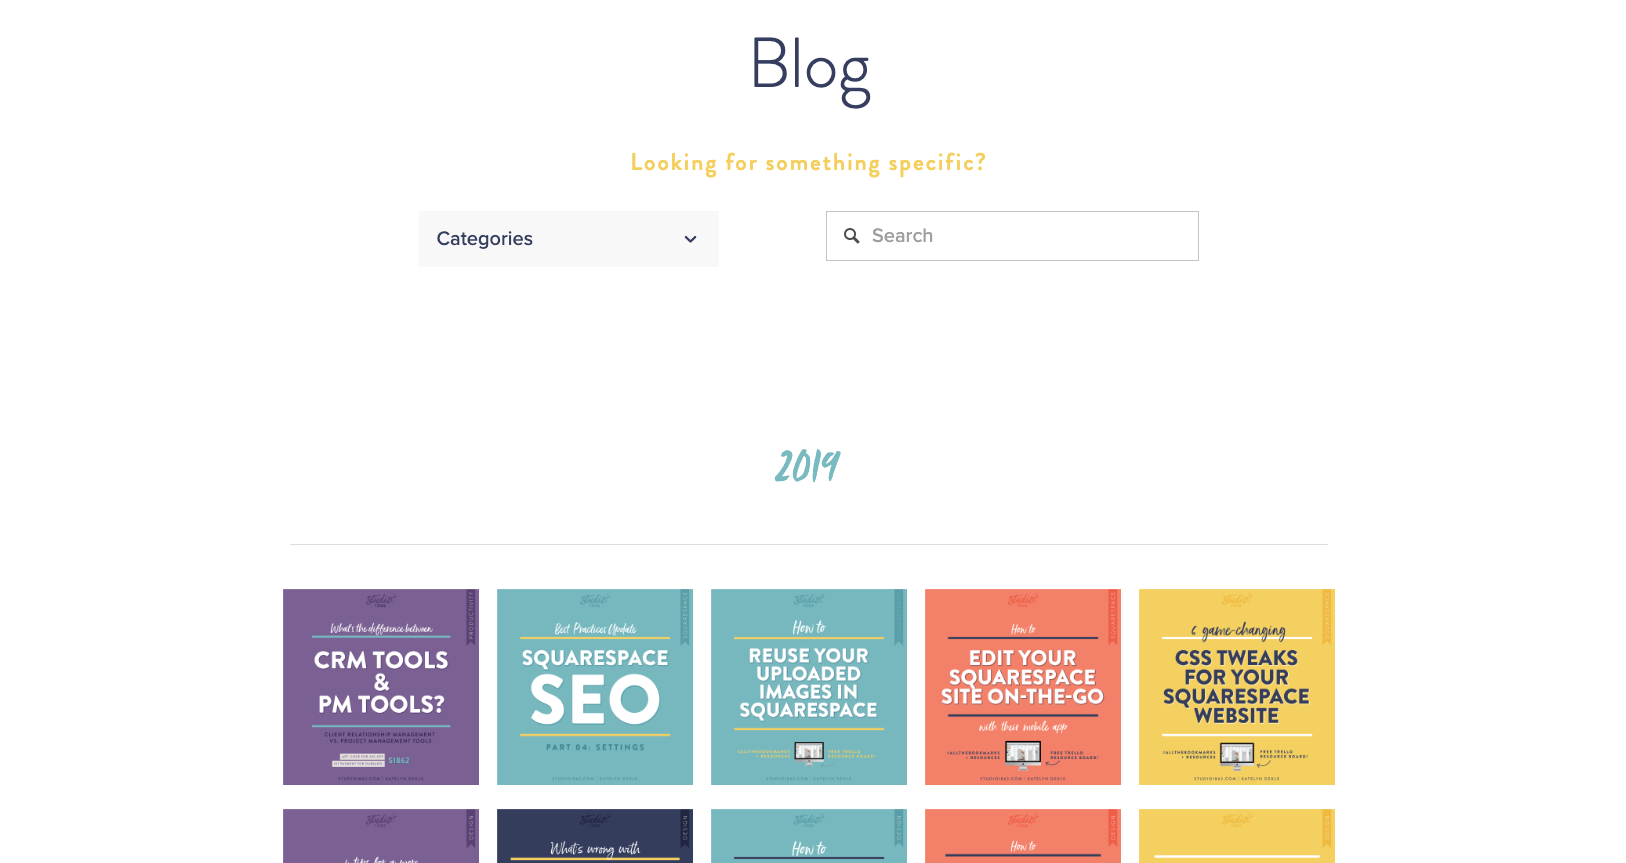
(example via Studio 1862)
Option 2: Links to separate archive pages for each category, with most recent posts below
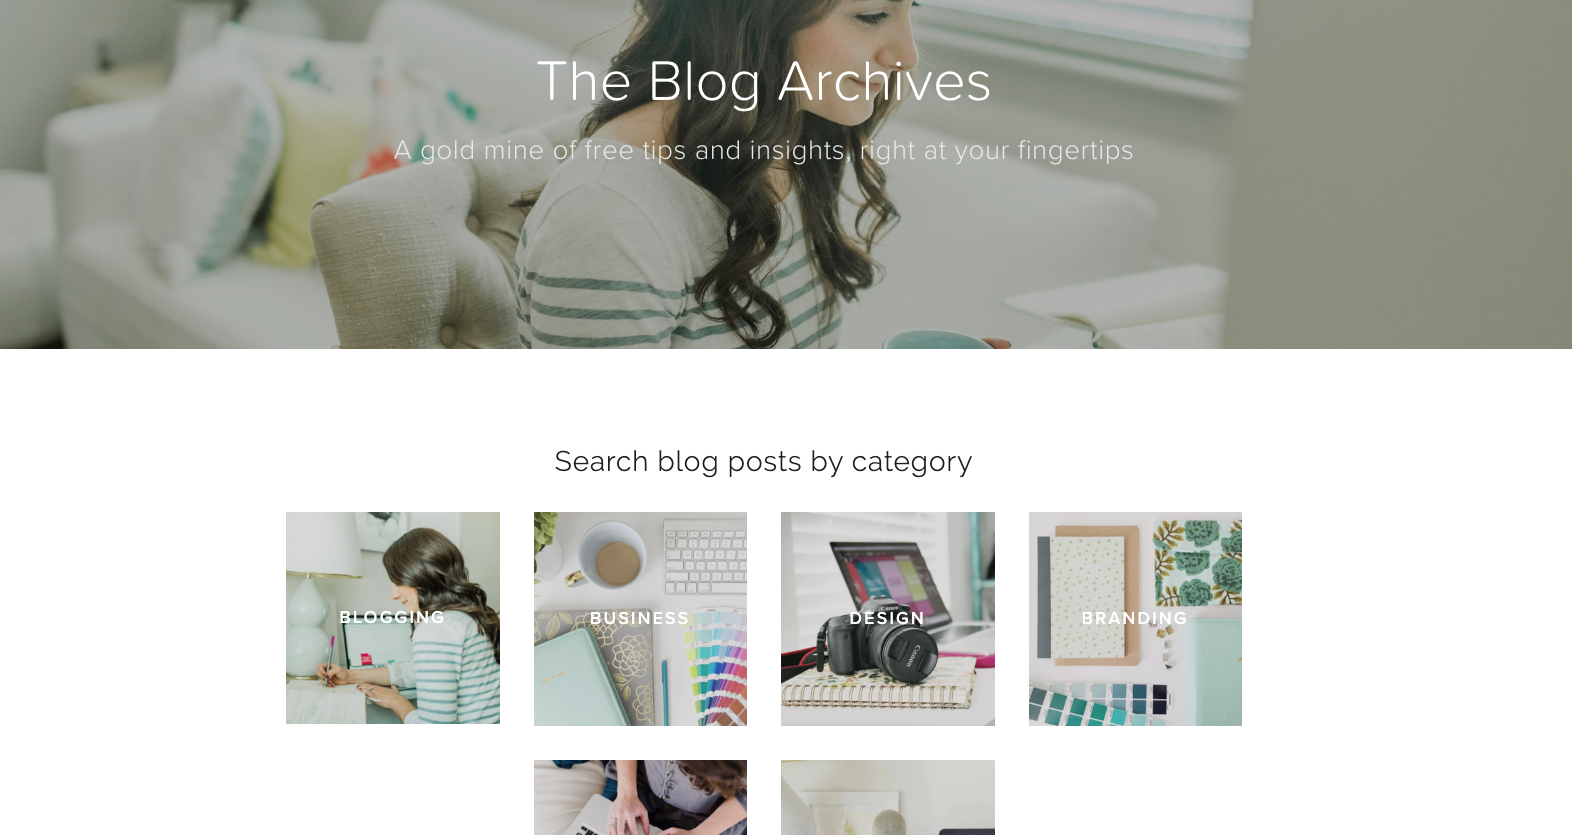
(example via Elle & Co.)
Setting up your blog post index: Option 1
Here’s what you’ll do to create a single-page archive displaying all of your blog post categories:
1. Create a new page
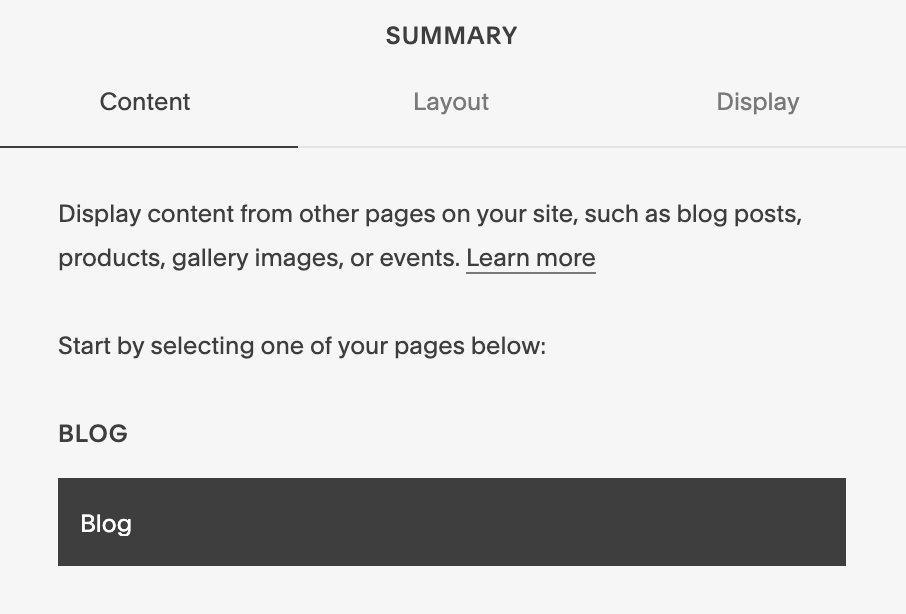
2. Add a summary block & complete the following steps:
Select where your summary block will be pulling content from (the specific blog on your site where your posts are being published—typically you’ll have just one active blog on your site, but it’s possible to have multiple for different purposes).
Choose your layout, aspect ratio for thumbnail images, and how many posts you’d like to display per row.

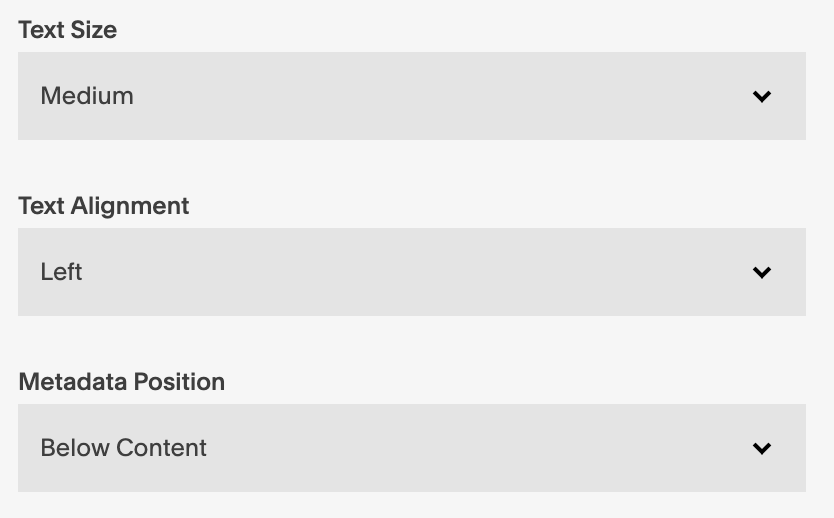
Choose other layout options, including text size and alignment, and metadata position.
Choose the number of items your archive will display (max is 30, though we’ll talk through how to add more below).
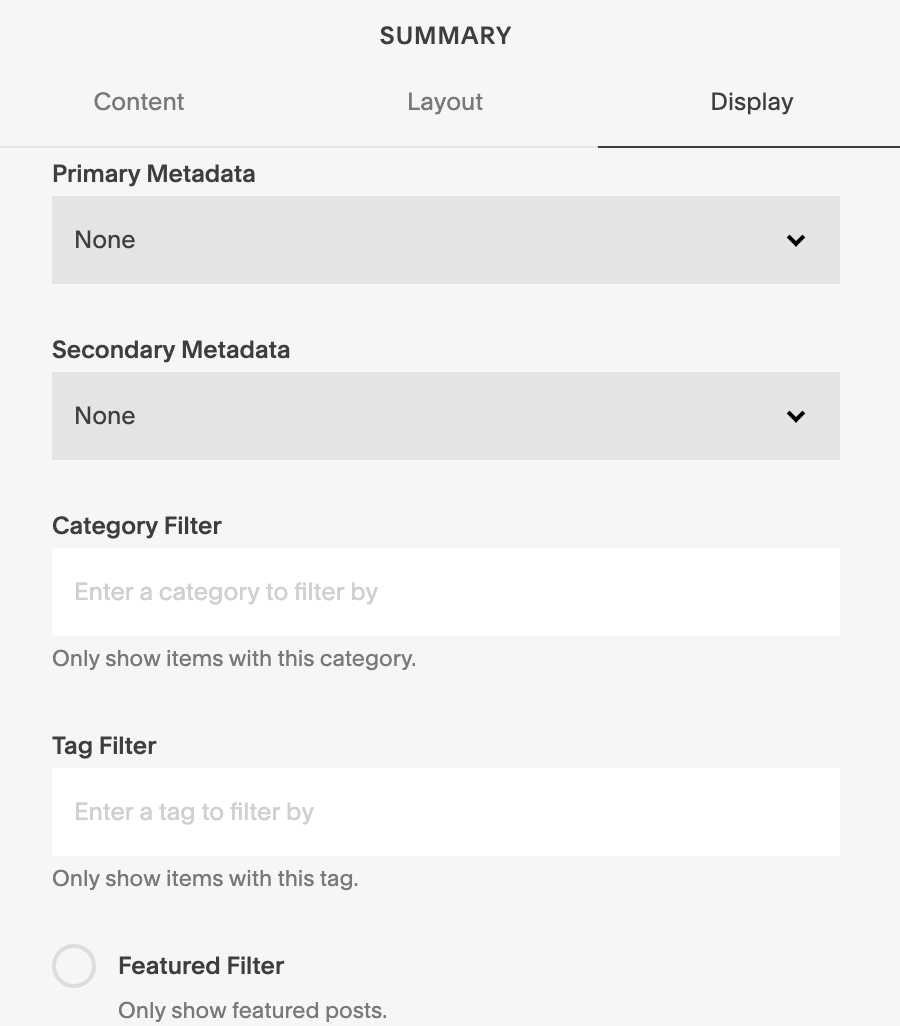
Choose what information you’d like to be displayed for each post (title, thumbnail, excerpt, read more link).

Each post can display two pieces of metadata (date, category, tags, author, location or comments). Choose which primary and secondary metadata will be displayed on your posts.
Now, most importantly, you’ll tell the summary block which category of blog posts it should display. In the Category Filter box, type the name of the category you’d like displayed (since you’ve already added the categories to your Blog, they should autofill as you begin typing).
3. Repeat step #2 for each category
You’ll use the same settings for each category’s summary block, with the exception of Category Filter, which will be unique to each category.
4. Arrange the summary blocks as you’d like
Arrange your category-specific summary blocks on the page as you’d like and add any additional page elements you’ll need—such as a page header or stylized headers for each category.
Setting up your blog post index: Option 2
1. Create a new page
As an example, we’ll title this page with the URL slug /archives.
2. Create new pages for each of your categories
As an example, we’ll call them /web-design, /blogging, /entrepreneurship, etc.
3. On each of your category pages, add a summary block & complete the following steps:
(See screenshots of each step above, in instructions for Option 1)
Select where your summary block will be pulling content from (the blog where your posts are being published).
Choose your layout, aspect ratio for thumbnail images, and how many posts you’d like to display per row.
Choose other layout options, including text size and alignment and metadata position.
Choose the number of items your archive will display (max is 30, though we’ll talk through how to add more below).
Choose what information you’d like to be displayed for each post (title, thumbnail, excerpt, read more link).
Each post can display two pieces of metadata (date, category, tags, author, location or comments). Choose which primary and secondary metadata will be displayed on your posts.
Now, most importantly, you’ll tell the summary block which category of blog posts it should display. In the Category Filter box, type the name of the category you’d like displayed (since you’ve already added the categories to your Blog, they should autofill as you begin typing).
4. On your main archive page ( /archives), add a summary block & complete the steps outlined in step #3
However, as this summary block will display highlighted or recent posts (rather than filtering them by category), the last step will be slightly different than what you did for the category pages.
If you’d like to display your most recent blog posts, regardless of category, simply leave the Category Filter field blank and the summary block will not filter by category.
If you’d like to display a curated collection of highlighted blog posts, you’ll utilize the Featured Post setting—select this setting on any blog post you’d like to feature (Blog Post Editor > Options > Featured Post) and in your summary block settings, select Featured Filter. This will only display posts that have been tagged by you as featured.
5. Above your summary block of the latest (or featured) blog posts, add your category links.
These links will be composed of text blocks, buttons, or images (your call) for each of the categories, each linked to its individual category page.
Squarespace blog archive customizations
If you have more than 30 posts in a category…
Squarespace summary blocks allow for a maximum of 30 items. So, if you have more than 30 items in a particular category, here are your options for displaying them on your blog archives page(s):
1. Divide your category into multiple summary blocks
You can place multiple summary blocks back-to-back to allow for a continuous flow of archives.
You’ll follow the same steps outlined above to create the summary blocks linked to your blog content, but we’ll tweak the way the blog posts are tagged and how they’re being pulled into the summary block.
For example, you may tag the first 30 posts you have in your category archive “blogging1” and then in the summary block settings filter by tag “blogging1” rather than category.
2. Add a “See More” link
Immediately following your summary block, add a “See More” text link that points to another page with an additional summary block, as described in step #1 above.
3. Choose 30 posts to highlight
Simply choose 30 featured posts to highlight in your summary block. Immediately following the summary block you can add a “See all BLOGGING posts” text link and link to the full category page for that category (for example, here’s the link to all of my “Blogging” category posts: fivedesign.co/blog/category/Blogging).
Making your blog archive searchable
There are several different ways to add search capability to your Squarespace website, but for a blog post index you’ll likely want to add something very visible and easy-to-use on your blog archive page.
For this, there are two different Squarespace search methods to know about and consider:
Squarespace Search Block
The Squarespace Search block is a pre-built search bar that can be added to any page on your Squarespace website.
The Search block also includes the “Search Specific Page” feature, which allows you, for example, to limit your blog archive search results to just your blog pages (rather than your About page, Contact page, etc.).

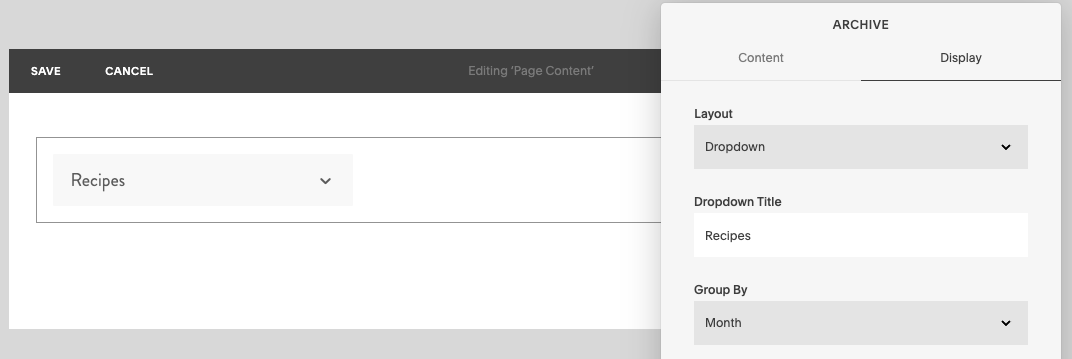
Squarespace Archive Block
Squarespace also has a pre-built Archive block that can help visitors search blog content by certain metadata. The Archive block can be displayed in an index, list or dropdown. Content can be grouped by month, year, category, tag, or author.
Below is an example of a blog that uses both the Search and Archive blocks:

(image via Amanda Frederickson)

Grow your business & brand with content your audience loves!
Grab my free Blog Post Checklist: